
How to add social media feeds (Twitter, Facebook & Instagram) to a WordPress website using only the Jetpack plugin and some widgets.
Everything related to WordPress Web Development.
How to add social media feeds (Twitter, Facebook & Instagram) to a WordPress website using only the Jetpack plugin and some widgets.
Posted on 13/12/2022

How to fix 404 Page Not Found Error caused by updating Co-Authors Plus to versions 3.5.4, 3.5.5, 3.5.6 onwards on custom author archives.
Posted on 08/12/2022
How to move a site hosted on Flywheel from one organisation to another by cloning it after inviting the new organisation as a collaborator.
Posted on 05/12/2022
Download AWS for WordPress (which has now been removed from the plugins list) containing both the standard version and another with WP-ShowHide support.
Posted on 31/10/2022
How to update Facebook Pixel For WordPress plugin on your WordPress website to work with PHP 8 and stop the daily error message emails.
Posted on 29/10/2022

I was recently asked to add the feature of replacing featured images with YouTube videos which was easy with the “Really Simple Featured Video” plugin.
Posted on 01/09/2022
How to connect WPForms to Google Sheets quickly using a simple WordPress plugin “WPForms Google Sheet Connector”.
Posted on 15/08/2022
My updated Understrap Child Theme “underdavid-base” which I used on sites like Tees Valley Arts, Redcar Palace and RCVDA.
Posted on 28/07/2022
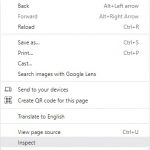
Here I have scrapped together a few simple tips for when your inspecting a WordPress website your working on.
Posted on 26/07/2022
If you are like me you have a lot of plugins clogging up your admin bar with unnecessary links or you want to customise it by adding your own.
Posted on 08/07/2022
